Explore Different Types of Smokers for Your Backyard
Ready to pick the right smoker? This short buyer’s guide walks you through the main types of backyard smokers and how each…
Ready to pick the right smoker? This short buyer’s guide walks you through the main types of backyard smokers and how each one fits your budget, time, and flavor goals.
We’ll compare set-and-forget options like pellet smokers with hoppers and digital controllers to fast-lighting propane and easy electric smokers. You’ll learn why charcoal smokers give deeper bark and why offset smokers shine for traditional stick-burning.
Expect clear advice on fuel cost, startup time, temperature control, and cleanup. We’ll note practical points like keeping spare propane tanks, how long pellets last at 225°F, and why cheap offsets can leak heat.
By the end you’ll have a confident short list tuned to how you like to cook, whether you want precise temperature automation, big capacity for guests, or rich wood-fired flavor.
Key Takeaways
- Pellet smokers offer digital control and convenience for steady temperature.
- Electric smokers are simple and low-maintenance, but yield milder smoke flavor.
- Charcoal and offset smokers give deeper combustion flavor but need hands-on tending.
- Consider fuel cost, startup time, and needed capacity before you buy.
- Plan for safety, power or propane access, and spare fuel to avoid mid-cook surprises.
What This Buyer’s Guide Covers
This guide breaks down common backyard smoker choices and what each delivers for heat, smoke, and flavor.
Scope: We give a complete breakdown of major smokers — electric, gas/propane, charcoal, pellet, offset, kamado, and kettle designs. You’ll see how each creates heat and where the smoke comes from.
Fuel source notes: electricity and propane offer fast starts and simple controls. Charcoal and wood bring combustion-forward flavor. Pellets combine automation with real wood heat.
How we evaluate models: temperature targets, control systems, warm-up times, and daily ease of use. We’ll compare real warm-up minutes and how steady a unit holds temperature.
Wood chips are highlighted for electric smokers and propane units that need added smoke. We contrast that to the deeper bark you get from charcoal and wood-fired designs.
Expect gear recommendations — thermometers, water pans, deflector plates, and pellet hoppers — plus quick pros and cons, best food styles, and learning-curve notes. Whether you want easy use for weeknight ribs or a hands-on pick for overnight brisket, this guide points you to the right smoker for your routine.
How Smokers Work: Heat, Smoke, and Flavor
Good smoke starts where heat, airflow, and fuel meet — that trio shapes every result in the cooking chamber. Burned wood and charcoal produce gases and tiny particles that travel with the air and coat meat, adding flavor and helping tenderize connective tissue.
Indirect vs Direct Heat in Real-World Smoking
Use indirect heat (200–275°F) for large cuts like brisket and pork shoulder. Low temperatures and slow airflow let smoke penetrate and break down collagen without drying the meat.
Direct heat suits quick sears and small cuts. High heat crisps skin and finishes wings or sausages fast.
Different smokers deliver these zones in their own way. A kettle can create an indirect zone with coals at one side. An offset with a reverse-flow baffle sends heat across the chamber for even cooking.
Temperature Control and Smoke Sources
Dampers and vents on charcoal units let you dial temperature and smoke by changing airflow. Pellet models use an auger and digital controller to keep a consistent temperature for long cooks. Electric smokers and propane units often rely on wood chips to add smoke rather than full combustion.
Water pans and deflector plates help stabilize heat, add moisture, and cut hot spots. Small vent tweaks cause big shifts, so make changes slowly and wait to see results.
- Choose dry, mild wood species for clean blue smoke and good flavor.
- Avoid thick white smoke — it tastes bitter.
- For steady long cooks, pellet fireboxes and digital control are easiest.
Key Buying Factors: Fuel Source, Temperature Control, Capacity, and Budget
Match your routine and space to a fuel source and control system that you will actually use every week.
Fuel choice: Pick clean automation or hands-on firecraft. Pellet smokers and an electric smoker give set-and-forget convenience. Charcoal and offset options deliver deeper bark and richer smoke but need tending.
Temperature, startup, and cost
Digital PID controllers on pellet units make steady temperature control easy. Propane and electric heat up fast—about 15 minutes for propane. Pellets warm and cycle shortly after startup; a 20 lb bag (~$20) runs roughly 16 hours at 225°F.
Capacity and budget
Cabinet electrics hold multiple racks for party-sized food. Large offsets handle briskets by the dozen. For small patios, kamado or kettle setups work better.
| Budget (US) | Likely Options | Advantages | Tradeoffs |
|---|---|---|---|
| $200–$500 | Charcoal, propane, entry electric | Affordable, decent for starters | Basic controls; avoid cheap offsets |
| $500–$1,000 | Mid-range pellet, better kamado | Improved temp control, build quality | Higher fuel or accessory cost |
| $1,000+ | Premium offsets, large pellet grills | Big capacity, long-term durability | Pricey; heavy and less portable |
Quick decision path
- If you want low effort and steady heat, choose pellet or electric.
- If flavor intensity and hands-on cooking appeal, pick charcoal or offset.
- Consider outlets, storage for charcoal or pellets, and spare propane bottles before buying.
Pellet Smokers: Set-and-Forget Convenience with Real Wood Flavor
Pellet grills use compressed wood for true smoke flavor while handling the work for you. A hopper feeds pellets into an auger, which drops them into a firebox where an igniter and airflow create steady heat.
How Pellet Smokers Maintain a Consistent Temperature
Digital controllers modulate the auger and fan to hold your desired temperature. Most units span roughly 160–500°F, so they work for low-and-slow and hot sears.
This automation is why consistent temperature is the hallmark: the controller adjusts feed rate to match heat loss in the cooking chamber.
Pros, Cons, and Who Should Buy
- Pros: real wood taste with set forget ease, multi-rack capacity, and minimal ash cleanup.
- Cons: needs electricity, pellet cost and supply, and a milder combustion profile than stick burners.
- Who should buy: busy home cooks, parents, and anyone who wants predictable results without constant tending.
Fuel, Hopper, Auger, and Firebox: What to Know Before You Buy
Look for a solid controller, reliable auger design, and good insulation for steady temperature. A 20 lb pellet bag runs about $20 and will last roughly 16 hours at 225°F.
Entry-level units start near $400; premium US-made builds can exceed $2,500 but add durability and better heat stability.
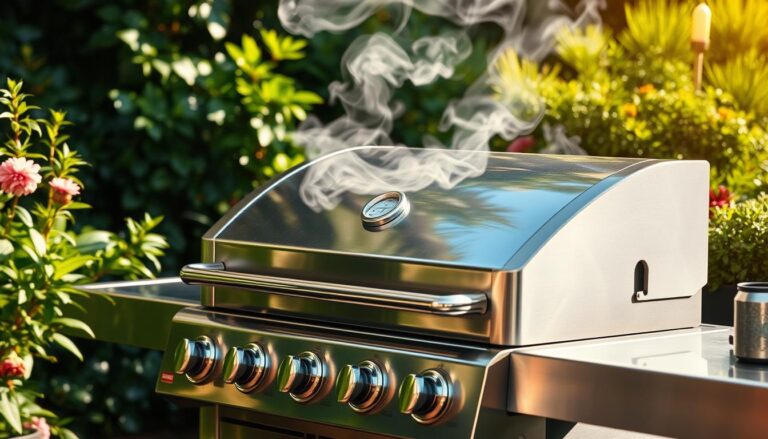
Propane Smokers: Fast Start, Easy Use, Portable Fuel Source
For quick weeknight cooks, propane cabinet smokers are hard to beat. They ignite fast and reach the desired temperature in roughly 10–15 minutes, making them a go-to for ribs and chicken when time is tight.
These units usually have burners at the bottom, vents up top, and a small tray for wood chips to add smoke. Burner dials and vents let you fine-tune temperature control. For longer cooks, monitor the flame and adjust vents slowly to stabilize heat.
Managing Propane Bottles and Flavor
Always plan a backup: keep two tanks and check levels before a long session. Weigh tanks or use a gauge to avoid surprise flameouts. Propane gas swaps are quick at tailgates, but secure transport and proper ventilation are essential.
“Use a second tank when you plan overnight cooks — it’s the easiest way to avoid a mid-cook stop.”
- Wood chips add timely bursts of smoke; check and replenish the chip tray on schedule to keep flavor consistent.
- Propane provides more combustion character than electric but is milder than charcoal or stick-burning setups.
- Portable and neat for camping or tailgates, but follow safe handling for propane gas tanks.
Best uses: sausage, ribs, chicken, and fish — foods that benefit from steady heat and reliable cooking with minimal babysitting.
Electric Smokers: Simple “Set and Forget” for Low and Slow
Electric smokers use a heating element and a small tray for wood chips, plus a water pan to stabilize moisture. Plug in, add chips, set the desired temperature, and the controller holds a steady profile for long, gentle cooks.
The workflow is effortless: preheat fully, load the wood chips, and let the unit run. That consistent temperature profile makes the electric smoker ideal for ribs, turkey breast, and smoked salmon. It’s also great for delicate foods like fish, vegetables, sausages, and cheese.
Flavor tradeoffs are real. Electric units produce a milder smoke character and usually lack the deep bark or strong smoke ring you get from charcoal or stick burning. If you want more bite, add fresh wood chips in small batches to avoid acrid smoke.
Practical tips: keep the water pan filled, preheat until the chamber stabilizes, and monitor chips so they smolder instead of flare. Electric models need power and perform best in calm weather or a sheltered spot.
“For beginners and apartment cooks, an electric choice delivers consistent heat with very little babysitting.”
| Feature | Benefit | Best Use |
|---|---|---|
| Heating element + chip tray | Easy set-and-forget heat | Low-and-slow smoking |
| Water pan | Added moisture, fewer hot spots | Delicate proteins, cheese |
| Plug-in power | Consistent temperature control | Weeknight cooks, beginners |
Charcoal Smokers: Classic Smoke, Hands-On Fire Control
A charcoal smoker puts flame control in your hands and smoke flavor on the plate. These units use charcoal — the char left after wood is heated above 1,000°F — for a clean, hot burn that you regulate with air intakes and exhaust dampers.
Getting Clean Heat and Smoke with Charcoal and Wood Chunks
Build a glowing bed of coals with a chimney starter, then nestle wood chunks on top to add aroma without choking the fire. Too little airflow makes bitter, white smoke; too much dries food and wastes fuel.
Stabilize temperature before loading meat. A water pan helps tame spikes on windy days and smooths heat for long cooks.
Pros, Cons, and Best Use Cases
Why choose charcoal: deeper bark, flexible fuel choices, and an authentic stick-fire experience. These smokers shine with ribs, pork shoulder, whole poultry, and any cut that benefits from a smoky crust.
Tradeoffs: longer startup, ash cleanup, and a learning curve for vents and temp control. Reward: more pronounced flavor and hands-on satisfaction.
“Dial the vents slowly—small moves make big temperature gains.”
| Style | Strengths | Best For |
|---|---|---|
| Bullet (e.g., Weber) | Compact, efficient heat | Ribs, brisket flat, weekend cooks |
| Drum | Simple build, large capacity | Multiple shoulders, party feeds |
| Ceramic (kamado) | Excellent heat retention | Long smokes and high-heat sears |
- Tip: Pre-light with a chimney starter and wait until coals glow before adding meat.
- Practice vent adjustments; patience pays off with clean smoke and deep flavor.
Offset Smokers: Traditional Stick Burners with a Side Firebox
Offset smokers deliver classic wood-fired flavor by moving heat and smoke from a side firebox across a large cooking chamber. These pits create an indirect environment that suits long cooks and big cuts, letting smoke coat meat while heat slowly breaks down collagen.
Standard vs Reverse Flow Designs
Standard offset designs place the chimney opposite the firebox so heat travels straight across the chamber. That gives strong directional smoke and easy fire management for experienced pitmasters.
Reverse-flow offsets add baffles under the grates to route heat and smoke back toward the firebox before exiting. This evens temperature and holds moisture, reducing hot spots on long briskets.
Managing the Firebox for Clean Heat and Blue Smoke
Use split, seasoned wood and keep a small, hot fire. Add fuel to the side firebox without opening the main chamber to retain steady temperature.
Watch for thin blue smoke — that means clean combustion and the best flavor. Thick white smoke signals incomplete burn and a bitter taste.
| Feature | Why It Matters | Buyer’s Cue |
|---|---|---|
| Thick steel body | Better heat retention for steady cooks | Choose 3/8″–1/2″ plate when possible |
| Tight seals & quality welds | Fewer leaks, easier temp control | Look for gasketed doors and flush seams |
| Reverse-flow baffle | More even heat and moisture retention | Prefer for long briskets and competition cooks |
| Accessible cleanouts & grates | Simpler maintenance and ash removal | Check for tool-free access panels |
- Pros: unparalleled traditional flavor, large capacity, and the ability to refuel without opening the main chamber.
- Cons: long preheat (often ~1 hour), frequent tending, and high cost for well-built pits; cheap offsets can leak and lose heat.
- Best use: brisket, ribs, and pork shoulder for parties or competitions where flavor depth matters more than convenience.
Kamado Grills: Ceramic Heat Retention for Smoking, Grilling, and Baking
A kamado grill uses thick ceramic walls and an egg shape to lock in heat and moisture. That design creates a steady cooking chamber that can smoke low-and-slow or blast heat for searing.
Small vent moves make big shifts in dome temperature, so learn gradual adjustments. Fuel with quality wood charcoal is efficient; you burn less fuel than many metal units.
In cold climates, the ceramic mass keeps heat stable when an offset or thin metal cooker struggles. Overshooting temps matters here—cooldown is slow, so plan carefully.
Kamados are versatile. Use one cooker for low-and-slow pork shoulder, high-heat pizza nights, and even baking. Many cooks trade a pellet for a kamado when they want hands-on control and richer flavor.
“Premium ceramic builds last for years, but expect a hefty price and a heavy, permanent home in your backyard.”
Pros: excellent heat retention, fuel efficiency, and multi-function use. Cons: cost, weight, and a short learning curve for venting.
Kettle Grills as Smokers: Budget-Friendly Way to Try Low and Slow
A simple kettle grill can turn into a weekend pit for tender ribs with just a few smart tweaks. This is an affordable way to learn smoking basics without buying a dedicated smoker.
The Snake Method for Long, Even Burns
The snake method stacks unlit briquettes in a C-shape, two wide and two high, around the kettle’s edge. Light a few coals at one end so the chain burns slowly across the bed.
Place small wood chunks atop the snake to add real wood charcoal aroma and a gentle smoke profile. Set a water pan above the lit section to buffer heat and keep food moist.
Put your meat opposite the coals for indirect cooking. Use the bottom vents to feed the fire and the top vent over the meat to draw smoke across the food for balanced flavor.
- Pros: low cost, compact storage, and great flavor for small batches.
- Cons: less precise airflow, limited capacity, and routine ash cleanup like other charcoal setups.
- Ideal for a trial run—try ribs or pork loin before investing in a full-size smoker.
“A kettle with the snake method gives surprising results—it’s a practical first step into real smoking.”
Exploring Different Types of Smokers by Cooking Style and Time
Pick a cooking style first — that choice narrows which smoker matches your schedule and flavor goals. Low-and-slow runs usually sit between 200–275°F and reward patience with tender meat and deep flavor.
Low and Slow vs Hot and Fast
Low-and-slow: pellet smokers and electric smokers hold steady temperature with automation, making overnight brisket and long shoulders simple. Charcoal and offset units demand more tending but deliver richer bark and a stronger smoke profile.
Hot-and-fast: Kamados and kettles excel for searing and quick roasts. Many pellets can reach high temps for a roast or to finish a cut with a crisp crust.
Set-and-Forget vs Hands-On Fire Management
Set-and-forget options fit weeknight cooks who want predictable food with minimal babysitting. Hands-on firecraft suits tinkerers who like tweaking vents, adding wood, and chasing perfect blue smoke.
- Time: choose the cooker that matches your weekly routine, not just weekend ambition.
- Hybrid tip: run a pellet for an overnight cook, then finish on a kamado or kettle for bark and texture.
Fuel Source Breakdown: Pellets, Propane Gas, Charcoal, and Wood
Fuel choice shapes how your cooker starts, how steady it runs, and what your meat tastes like.
Pellet: Compressed sawdust feeds a hopper and auger into a firebox for a near-automatic burn. Pellets give very stable temperature control and predictable consumption — roughly 20 lb per 16 hours at 225°F. Store pellets dry in a sealed bin for best results.
Propane: Burner-driven heat brings fast startup and easy dial control. Add wood chips in a tray for short bursts of smoke. Tanks are portable but need refills and safe storage; keep a spare for long cooks.
Charcoal: Briquettes or lump give strong heat and deep flavor. You’ll manage airflow with dampers and accept more ash cleanup. Wood chunks add aroma while coals supply steady radiant heat through the cooking chamber.
Wood logs / Offset: Pure stick-burning rewards skill with unmatched traditional smoke. Offsets need active fire management to hold blue smoke and steady temps. Expect more tending but richer bark and complex flavor.
| Fuel | Startup | Flavor | Control | Best Match |
|---|---|---|---|---|
| Pellet | Slow to stabilize, then steady | Mild-clean wood | Digital PID / set-and-forget | Busy cooks, long overnight |
| Propane | Very fast (10–15 min) | Mild to medium with chips | Dial + vents | Weeknight ribs, portable use |
| Charcoal | Moderate (chimney start) | Deep, robust | Manual dampers | Hands-on cooks, backyard parties |
| Wood logs | Slow, skill-dependent | Strong, traditional | Firecraft and airflow | Offset pits, competition-style |
Pairing advice: Pick pellets or propane if you want predictable smokers and less babysitting. Choose charcoal or wood if you prefer a hands-on pit and deeper bark on your food. Match fuel to your climate, space, and weekly schedule for the best results.
“Choose the fuel that fits how you like to cook — not the other way around.”
Temperature Control and Consistency: From Dampers to Digital Controllers
Controlling heat and airflow turns guesswork into repeatable results on any backyard cooker.
Desired Temperature, Airflow, and Moisture Management
Charcoal setups use intake and exhaust dampers to set chamber temperature. Small vent moves make big changes, so adjust gradually and wait for the grill to respond.
Pellet cookers rely on digital controllers that modulate auger feed and fans for a near consistent temperature. That automation keeps long cooks steady with little babysitting.
Electric smokers use thermostats and a heating element. Add a water pan to buffer spikes, keep the air humid, and help smoke stick to the meat.
Offset pits benefit from reverse-flow baffles to even heat, but they still need active fire management and frequent attention to stay stable.
Practical tips:
- Preheat fully before loading meat and set vents or controller targets.
- Place probe at grate level near the thickest cut, not the dome.
- Use a water pan in dry or windy conditions to steady heat and help smoke adhere.
| Control Method | How It Works | Best For |
|---|---|---|
| Dampers & vents | Manual airflow to change heat and smoke | Charcoal and hands-on cooks |
| Digital controller | Auger + fan modulate fuel for steady heat | Pellet cooks and overnight sessions |
| Thermostat element | Heater cycles to hold set temp; add chips for smoke | Beginners and simple low-and-slow cooks |
Space, Capacity, and Portability: From Balcony Setups to Backyard Beasts
Size and site shape your options — a balcony needs a compact unit, while a wide yard can host a full pit. Match the cooker to your available footprint before you narrow down models.
Weight and mobility: ceramic kamados are heavy and usually stay put. Offsets have large footprints and can be hard to move. By contrast, gas cabinet units and kettles are light and easy to store.
Utility access: electric and pellet units need power for the element or auger. Propane requires safe tank storage and handling. Keep charcoal dry and accessible if you prefer lump or briquettes.
Capacity and cooking style: cabinet-style smokers give multiple racks for trays and party feeds. Wide grates suit full packer briskets and big roasts. Think about temperature zones and how many plates of food you’ll prep at once.
Layout tips: place your unit on a level, non-combustible surface with clearances for airflow and safety. Use wind breaks to help steady heat and avoid sudden temperature swings that ruin a long smoke.
- Plan storage for extra fuel — pellets, charcoal, or wood — and room for covers and prep tables.
- Choose a portable model if you move often; pick a heavy, well-built pit if backyard permanence matters.
“Give yourself space for the cooker, fuel, and a prep area — it makes every cook easier and safer.”
Match size to routine and you’ll get the right balance of portability, capacity, and consistent flavor for great backyard cooking.
Budget Ranges in the US Market Right Now: What You Get at Each Price Point
Picking a price tier helps set realistic expectations for build quality, temperature control, capacity, and long-term value. Below is a short guide to what each budget typically delivers and where to spend a little extra for meaningful upgrades.
Entry-Level (≈ $200–$500)
Best-value options under $500 include reliable charcoal cookers, propane smokers, and basic electric smokers. You’ll find decent performance for weeknight cooking and occasional weekend use.
What to expect: thinner steel, simple dampers or basic thermostats, and modest capacity. Avoid cheap offsets in this bracket — they often leak heat and frustrate temperature control.
Mid-Range ($500–$1,000)
Mid-range smokers bring thicker steel, better seals, and more stable controllers. Pellet units start to offer true consistent temperature control here, and kamado-style ceramics improve heat retention.
Upgrades you get: improved gaskets, stronger hoppers or augers on pellet models, and larger cooking surfaces for party-size food prep.
Premium ($1,000+)
Premium buys include heavy-duty offsets (Yoder and similar), high-end pellet smokers, and large kamados. These units deliver durability, tighter temp control, and professional features.
When to splurge: invest in a competition-level offset or a top-tier pellet smoker if you want longevity, versatility, and the best flavor payoff from wood and charcoal.
| Price Tier | Typical Options | Key Strengths | Limitations |
|---|---|---|---|
| $200–$500 | Charcoal, propane smokers, entry electric | Low cost, easy to start, good for beginners | Thinner steel, basic controls, avoid cheap offsets |
| $500–$1,000 | Mid-range pellet, better kamado, larger kettles | Thicker steel, better seals, more stable temperature | Higher upfront cost, some accessories extra |
| $1,000+ | Premium offset, high-end pellet smoker, top kamado | Durability, superior heat retention, pro-level performance | Expensive, heavier, less portable |
Quick buying tip:Choose an electric smoker or propane cabinet under $500 for ease, pick a mid-range pellet smoker for consistent temperature and daily convenience, and buy a high-end offset or kamado if deep wood-fired flavor and longevity are your priorities.
Conclusion
Choose the cooker you will actually use. Match time, space, and how bold you want wood flavor to be. A pellet unit gives automated, wood-fired convenience. An offset yields deep traditional results if you enjoy hands-on firecraft.
Electric is the easiest route for steady temperature and minimal babysitting. Propane brings fast startup and portability. Charcoal sits between those choices, offering classic depth with more vent work and ash cleanup.
Budget for build quality where it matters: seals, steel thickness, and reliable controllers that hold heat. Shortlist two models per category and compare controller type, capacity, and warranty before buying.
Start small, cook often. Regular practice with airflow, fuel, and patience delivers the best flavor and long-term enjoyment.