Unlock the Secret to Mastering BBQ Brisket
Welcome. This friendly, step-by-step intro shows how low-and-slow cooking turns a whole packer cut into tender, juicy slices. You will learn the…
Welcome. This friendly, step-by-step intro shows how low-and-slow cooking turns a whole packer cut into tender, juicy slices. You will learn the exact time and temperature cues that pitmasters use, plus simple trimming and resting tips that protect the meat’s rich flavor.
We cover how a smoked brisket is cooked at about 225°F until it hits 165°F, then wrapped and finished to 195–202°F. Resting 1–2 hours is critical for juicy slices. You’ll also get wood pairing notes (hickory, oak, apple, pecan, cherry, mesquite, maple) so your beef tastes balanced, not overpowering.
If you lack a smoker, an oven at 300°F covered will still give great results. Food safety and storage tips are tucked in, and beginners get clear, pitmaster-level fixes for the stall, wrapping, and slicing against the grain.
Key Takeaways
- Cook low and slow; use a thermometer, not just the clock.
- Wrap at the stall and finish to 195–202°F for tenderness.
- Rest 1–2 hours before slicing against the grain.
- Choose wood that complements beef—apple, hickory, or oak work well.
- Oven method at 300°F is a solid alternative for home cooks.
- Store leftovers refrigerated 3–4 days or freeze up to 3 months.
Why this how-to guide works today for smoked beef brisket
Repeatable smoked beef comes from tracking temp and tenderness. This guide focuses on measurable targets instead of old rules of thumb. A backyard smoker set near 225°F and steady smoke gives consistent results for most home cooks.
Champion pitmasters aim for a final finish at about 200–205°F and confirm tenderness by probing. Modern probes remove guesswork and let you manage internal temperature brisket targets rather than relying on clock-based estimates.
Understanding the stall—evaporative cooling during the cook—helps you decide whether to ride it out or wrap with butcher paper or foil. Wrapping at the right moment helps the cut push through the stall while preserving bark and moisture.
A restrained seasoning lets the natural flavor of the beef brisket shine. Resting for 1–2+ hours is essential; it redistributes juices and produces tender slices. Even with different weather or gear, tracking temperature, probe tenderness, and patient time keeps this method dependable.
| Feature | Why it matters | Home-cook tip |
|---|---|---|
| Steady heat | Promotes even render and consistent smoke absorption | Use a pellet smoker preheated to 225°F |
| Probe thermometer | Removes guesswork around doneness and tenderness | Place probe in the thickest part of the flat or point |
| Wrap at stall | Speeds through stall while protecting bark and moisture | Use peach butcher paper for balance, foil for speed |
Choose the right cut: from whole packer brisket to point and flat
Start at the counter: the right whole packer gives you the best shot at juicy slices and consistent cooking. Pick an untrimmed packer brisket so you can set the fat cap and shape the meat for even heat.
Beef grades and marbling: Prime vs Choice
Prime has the most marbling and stays moist longer during long cooks. It costs more but is forgiving on the flat. Choice delivers excellent value and will still make great smoked meat when cooked properly.
Understanding the point and the flat
The whole packer contains two muscles: the lean flat and the fattier point. The flat is tidy but harder to make tender. The point holds more fat and is forgiving during long renders.
Flexibility, even flat, and checks at the butcher
- Pick up the cut and make sure it bends easily — flexibility indicates good muscle texture.
- Inspect the flat for uniform thickness; a smooth flat helps prevent dry slices.
- Check for hidden hard fat pockets; these slow rendering and make slicing unpleasant.
- Choose an untrimmed whole packer so you can control fat profile and squaring before the cook.
- For home smokers, aim for a 10–14 lb packer brisket — big enough to be forgiving but still manageable.
Trim like a pro: fat cap, silver skin, and squaring the edges
Start your work with a steady surface and a plan for the fat you’ll keep. Place the whole piece flat on a large cutting board, fat side down. This gives control when you remove brisket silver and shape the meat.
Set the fat cap to about 1/4 inch. That thickness renders without leaving a waxy layer that blocks smoke and rub contact. Remember, beef fat doesn’t melt like pork, so trimming improves texture and bark formation.
- Use a sharp knife to shear off silver skin and hard seams. Work with gentle, shallow strokes.
- Square ragged edges so thin flaps don’t overcook or burn. A streamlined shape promotes even airflow and uniform slices.
- Keep trimmings for tallow or grind, but avoid heavy deposits that won’t render during the long cook.
Work slowly to preserve the lean flat and avoid gouging meat. After trimming, pat the surface dry so seasonings stick and smoke adheres consistently. If you have access, ask your butcher for help squaring large pieces before the cook.
Season for bark and flavor: kosher salt, black pepper, and more
Use a coarse, balanced seasoning so smoke and natural beef flavor remain front and center.
Classic SPG base: Mix kosher salt, fresh cracked black pepper, and granulated garlic. This simple blend builds a savory bark and lets the brisket speak without heavy sweetness.
Flavor boosters and when to keep it simple
Add dark brown sugar and smoked paprika when you want a sweeter, deeper profile that still pairs with smoke. Keep the sugar light so the bark stays coarse and dry during the long cook.
- Season edge to edge; press the rub in without caking.
- Keep the grind coarse for a rugged bark that won’t turn pasty.
- Let the rub hydrate while your smoker preheats for better adhesion.
- Hold sauce for serving so the bark sets, rather than basting constantly.
| Rub Type | Main Use | Effect on Bark |
|---|---|---|
| SPG (kosher salt, black pepper, garlic) | Classic smoked beef | Savory, rugged bark |
| SPG + brown sugar | Sweeter profile | Caramelized, deeper color |
| SPG + smoked paprika | Smokier aroma | Richer smoke notes |
Tip: Start simple the first time, then tweak ratios on your next cook. Apply rub on all sides of the brisket so every slice has balanced seasoning for the best meat experience.
Set up your brisket smoker: temperature, wood, and placement
Good setup begins long before the brisket hits the grates: preheat, pick wood, and plan placement. Preheat the chamber fully to 225°F so the unit recovers quickly after you open the lid. This steady temperature gives a stable smoke window for low-and-slow cooking.
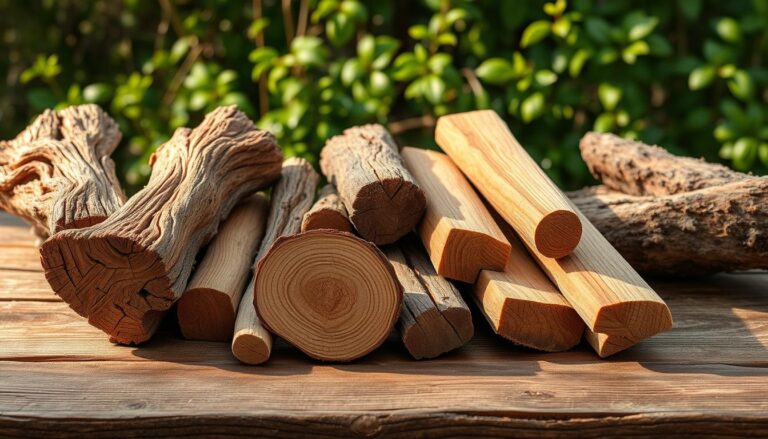
Choose wood that complements beef: hickory for sweet-savory depth, oak for subtle body, apple or cherry for gentle fruit notes, pecan for nutty richness, maple for light sweetness, and mesquite only sparingly for bold smoke. Use clean-burning pellets or splits to avoid bitter flavors.
Placement and cook timing
Position the packer with the point facing the main heat source so the fattier end shields the flat. Decide on fat side up or down based on your cooker’s heat pattern — the key is steady airflow and consistent heat, not which side faces up.
- Keep the lid closed as much as possible during the first several hours.
- Expect about 8–9 hours to reach ~165°F before wrapping at 225°F; adjust by probe, not the clock.
- Place a drip pan if you want easier cleanup without steaming the meat.
“Cook by temperature and tenderness, not calendar time.”
With a reliable setup you’ll give every slice of smoked brisket the best chance to shine.
Internal temperature brisket basics: the stall, tenderness, and finishing temps
Understanding how internal temperature climbs during a long smoke helps you push through the stall with confidence. The stall happens when surface moisture evaporates and cools the meat, slowing the rise in internal temperature. That pause can last for hours, so patience matters more than hurry.
Why the stall occurs and how cooks handle it
Evaporative cooling is the cause: as juices reach the surface they evaporate, which lowers the surface heat and halts the temp climb. Many cooks wrap near 165°F to push the cook forward while protecting bark and moisture.
Target temps and the probe test
Finish most large cuts around 200–205°F, then use a probe in the thickest section to confirm butter-like tenderness. If the probe slides with very little resistance, the meat is ready. Resist slicing early—carryover and a 1–2 hour rest improve juiciness.
Altitude, grade, and relying on instruments
Higher grades (Prime or wagyu) and high altitude can shift final feel and rendering, so the finish temp may vary. Always trust a meat thermometer instead of a rigid time table.
- Check multiple spots, especially the flat, so the entire piece reaches tenderness.
- Record temps and times for each cook; notes help you refine the next run.
“Cook by temperature and tenderness, not by the clock.”
The secret to perfect bbq brisket
Nailing a calm, low fire and wrapping at the right moment keeps moisture where it belongs and preserves a rugged bark.
Balance low, slow heat with timely wrap technique
Keep the smoker steady and watch the probe, not the clock. Wrap brisket when it hits the stall or when the probe shows resistance that won’t ease. This protects juices without over-steaming the surface.
Peach butcher paper vs foil: bark, moisture, and cook speed
Peach butcher paper breathes, so bark stays coarse and flavorful. Foil speeds the cook and locks moisture, but it softens bark and can glaze the surface.
- Choose butcher paper for best bark quality.
- Choose foil when you need a faster finish.
- Rewrap loosely after probe-tender; don’t tear the paper and lose juices.
Resting wrapped brisket 1–2+ hours for juicy slices
Rest at least 1–2 hours in a dry cooler or a warm oven to let juices redistribute. Rest duration matters as much as hitting temp — this is where slices stay juicy.
“A calm fire, the right wrap, and a proper rest yield consistent results across most smokers.”
Your cook timeline: anywhere hours from smoke to slice
Plan the day around simple checkpoints, not an exact clock. A clear timeline gives you cushion for rest, sides, and weather changes while keeping cook time realistic.
Unwrapped: warm smoke to ~165°F (about 8–9 hours)
At 225°F the initial, unwrapped phase normally runs near eight to nine hours for a typical packer. This window builds bark and flavor while the meat enters the stall.
Use a probe in the thickest part of the flat and point so you know when the unwrapped stage is done.
Wrapped: finish near 200–205°F (usually 3–4 more hours)
Once wrapped, the cook often shortens by a few hours as steam and trapped heat push the render. A wrapped brisket commonly needs another three to four hours to reach final tenderness.
Finish by feel as much as by temp — the probe should glide with little resistance.
- Build buffer time into your plan so the rest is never rushed.
- Probe multiple spots; the flat may lag or lead the point.
- Keep notes on weight, weather, and pit performance for repeatable runs.
- Warm sides during the wrapped phase so everything is ready when the meat coasts to tenderness.
- Prioritize tenderness over the clock for the best sliced result.
“Cook by temperature and tenderness, not by the clock.”
How to wrap brisket in peach butcher paper the right way
Use peach butcher paper for a breathable finish that balances moisture and texture. This method keeps bark firm while helping the meat reach tenderness.
Set up on a clean cutting board or table and roll out enough paper for a snug, double-layer wrap.
Prep and spritz before wrapping
Lightly spritz the surface with apple juice or cider. This adds a bit of moisture without collapsing the bark.
Wrap snug and seal
Fold the edges tightly and secure corners so juices won’t leak. Place brisket seam side down; the weight helps seal the wrap and stops unraveling.
Return the wrapped meat to a 225°F smoker and resist poking holes. If you must check temp, slide a probe through a seam to avoid tearing.
- Keep the wrap intact until the rest is finished.
- Discard the paper after slicing; it soaks up fat and bark bits.
| Step | Why it matters | Quick tip |
|---|---|---|
| Roll paper on cutting board | Gives room for tight double-layer seal | Use a clean surface and enough overlap |
| Spritz with apple juice | Adds surface moisture without soggy bark | Spray lightly; don’t drench |
| Place brisket seam side down | Weight seals the seam and prevents leaks | Fold edges snug around corners |
| Return at 225°F | Steady finish and even render | Avoid punctures; probe via seam if needed |
“A breathable wrap preserves bark and helps meat finish with steady heat.”
Slice for tenderness: cut against the grain on point and flat
Slicing is where patience and technique turn long hours into great plates. Let the rest do its work, then use clear steps to preserve moisture and texture. Target around 202°F when you want fall-apart pieces, or a few degrees lower for neat, sliceable results.
Find the grain, mark it, then flip before the point
Locate the grain on the flat and mark its direction while the bark is visible. Slice across that grain for short muscle fibers and tender bites.
Before you reach the point, flip brisket orientation and rotate the point so each slice still cuts against its different grain.
Use a long blade and a steady surface
Work on a solid cutting board and glide a long, sharp knife in single strokes. Avoid sawing — clean strokes keep juices locked in.
When to remove brisket and how to keep slices moist
Only remove brisket from the warmer when guests are ready. Keep the remaining meat wrapped between slicing.
Hold slices in their juices or a covered pan kept above 140°F. Save wrap juices and drizzle them over meat for added richness. If the flat feels tight, slice slightly thinner for tender bites.
- Mark grain direction before cutting.
- Slice pencil-thick across the flat; rotate at the point.
- Separate burnt ends for a different texture and service style.
“Good slicing shows respect for the cook’s time and the cut’s flavor.”
Serve and store: sides, leftovers, and food safety
Set the table with bright, simple sides that let rich smoked beef shine. Classic choices balance the meat’s richness and make plates feel complete. Keep sauces on the side so the bark stays crisp and guests can customize each bite.
Classic sides that pair well
Offer a mix of textures and flavors: a cool macaroni salad, sweet cornbread, and a crisp slaw brighten heavy slices.
Serve sauces—classic and tangy—in small bowls so guests add saucing without softening the crust.
Leftovers: fridge, freezer, and reheating
Package brisket quickly in airtight containers and label with the date. Refrigerate for 3–4 days or freeze up to 3 months in meal-size portions with a splash of saved juices.
Reheat low and slow with broth or reserved pan juices to keep slices tender. Turn leftovers into chili, nachos, or tacos for easy weeknight meals.
Room temperature rule and hot holding
Never leave cooked meat at room temperature for more than 2 hours. If trays must be out for service, keep them above 140°F — that extends safe holding time up to 4 hours.
“When in doubt, cool quickly or keep hot; food safety protects flavor and guests.”
- Suggest crowd-pleasing sides that complement rich slices: macaroni salad, cornbread, crisp slaw.
- Package leftovers in airtight containers and label with date for tracking.
- Freeze portions with extra juices for moist reheats and easy meals later.
- Follow the room temperature rule strictly: discard after 2 hours if not held hot.
No smoker? Oven-cooked brisket that still delivers
When you don’t have a smoker, the oven can still produce tender, sliceable brisket with predictable results. Start with the same trimmed whole packer your butcher would recommend so fat and shape are familiar. The method focuses on steady heat and moisture, not smoke.
Oven method and timing
Preheat to 275–300°F. Place the brisket fat-side up in a roasting pan and cover tightly. As a guideline, allow about 1–1.5 hours per pound, but treat this only as a starting point.
Maintain moisture
Baste every 30 minutes with rendered juices and add a shallow water pan in the oven for humidity. Covering the pan keeps the bark from overdrying while the interior renders.
Doneness and finishing
Finish when the internal temperature reaches 200–205°F and the probe test shows buttery tenderness. You can wrap late in foil if you want extra steam to speed the final push. Rest 30–60 minutes loose-covered before slicing.
“Trust the probe, not the clock.”
Troubleshooting and pro tips: bark, stall, dryness, and tools
Troubleshooting a tough or dry brisket starts with a quick review of heat consistency, wrap timing, and rest length.
Diagnose dryness by checking for big temp swings during the cook, whether you wrapped too early or late, and if the rest was short. A short rest often robs slices of juice, so aim for at least 1–2 hours after the finish.
Fixing a soft or washed-out bark
Prefer butcher paper over foil when you want a firmer bark. Paper breathes; foil traps steam and softens crust.
Limit spritzing—too much liquid washes rub off and prevents proper bark formation.
Handling the stall: ride or use the Texas Crutch
The stall is evaporative cooling—ride it out if you value bark, or use the Texas Crutch (wrap in paper or foil) to power through. Use the crutch strategically to shorten the cook while accepting a small bark trade-off.
Tools that matter
Calibrate and place your meat thermometer in the thickest part of the flat for true readings. Log probe spots and cook time so you can repeat what worked.
Upgrade to a razor-sharp slicing knife or long blade for clean cuts. Keep extra butcher paper on hand to rewrap if leaks or tears develop mid-cook.
“Patience and the right tools turn a good run into a great one.”
- Review heat, wrap choice, and rest if meat is dry.
- Choose paper over foil for better bark and limit spritzes.
- Log smoker behavior so future cooks predict stall length.
- Use a quality thermometer and sharp knife for reliable results.
Conclusion
Take the checklist—choose a whole packer brisket, trim thoughtfully, and run your smoker steady at the right temps. Use a strong, steady plan and a reliable thermometer rather than guessing by the clock.
Wrap at the stall and rest long enough; that time turns a tough cut into tender slices. Remember the point flat difference so you slice against the grain for the best texture.
Serve slices with a bright side and experiment with wood and rubs. Record notes on each run, tweak small variables, and you’ll repeat great results with your next whole packer or beef brisket. This method makes consistent smoked beef brisket you can count on.