Grill Cleaning Hacks: Top Tips for a Sparkling Grill
Ready to spend less time scrubbing and more time cooking? This short guide shows an easy, step-by-step way to get a truly…
Ready to spend less time scrubbing and more time cooking? This short guide shows an easy, step-by-step way to get a truly clean grill and keep it that way without long, tiring chores. You’ll learn the quick moves that make a big difference.
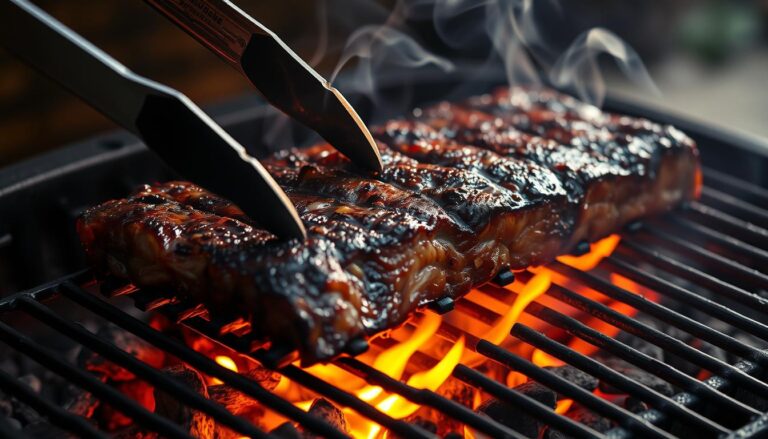
Start with the grate. Heat it on high for about five minutes to burn off stuck bits, then use a long-handle, firm-bristle brush or scouring pad to remove residue. Lightly oil the bars before cooking to reduce sticking, but avoid heavy oil that can spark flare-ups.
Small, steady maintenance beats rare marathons. Empty ash after each charcoal session to stop moisture from hardening. Keep the exterior wiped monthly and let the interior keep a thin seasoning layer to help regulate heat.
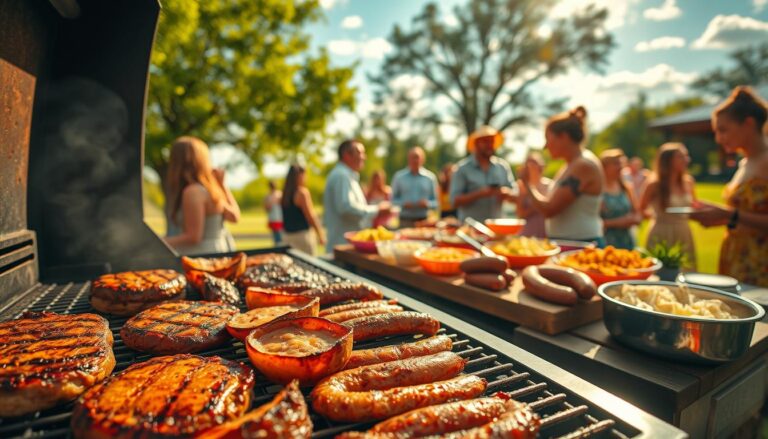
Whether you own a gas or charcoal model, these habits save time and boost performance. A fitted cover protects parts and extends service life. Follow these simple steps and your bbq will reward you with better flavor and longer life.
Key Takeaways
- Preheat grates on high for five minutes to burn off residue.
- Use a long-handle brush or scouring pad for quick, safe cleaning.
- Light oiling prevents sticking; avoid excess to stop flare-ups.
- Empty ash and wipe the exterior regularly to prevent damage.
- Keep light interior seasoning; deep-clean only when needed.
- Cover your unit to protect from weather and extend lifespan.
Why a clean grill matters for flavor, safety, and longevity
A well-kept cooking surface changes flavor, safety, and lifespan more than most people realize.
Better tasting food with fewer flare-ups
Cooking on a dirty grate transfers old, burnt-on residue and grease to new food. That smoke alters flavor and causes sudden flare-ups that char meals.
Preheating before you brush loosens stuck bits so a quick pass with a brush removes them instead of a long scrub.
Health and fire safety by reducing grease and residue
Leftover food and grease attract bacteria and mold, which raises health risks, especially with poultry and high-moisture cooking.
Keeping drip trays and burner ports clear reduces hot grease pockets and lowers fire danger. Make sure hidden areas get attention.
Prolonging your grill’s life and preventing rust
Regular maintenance slows corrosion and avoids costly repairs. Clearing debris keeps burners and vents flowing so your bbq hits target temps faster.
Clean gear also makes outdoor cooking more fun — better release, sharper sear marks, and fewer surprises each weekend.
Gear up: Brushes, cleaners, water, and what to prep before you start
Gathering the right gear before you start saves time and prevents frustration. Lay out tools in order and keep small parts in a tray so nothing goes missing.
Must-have tools and cleaners
Grab a long-handle firm-bristle brush or scouring pad for the grate. Prep a scraper or putty knife, rubber gloves, microfiber cloths, dish soap or a dedicated cleaner, baking soda, and vinegar.
Safety and disassembly basics
Gas models: make sure the fuel is off and disconnected. Remove grates and heat shields, and set burner covers and small parts in order for easy reassembly.
Charcoal users: empty cold ash into a metal bucket to avoid moisture buildup that can harden into a cement-like mass.
Pressurized water perks
Pressurized spray speeds rinsing and removes stubborn debris from grates and under the lid. Portable units with 3.5–5 gallon tanks and about 50 PSI give strong jets and adjustable patterns.
They cut total time and often use less water than lengthy low-pressure rinses.
- Use a bucket warm with soapy water and a second bucket for clean rinse water.
- Choose long-handle tools to reach across grill grates safely and apply leverage.
- Spend two to three minutes laying out tools; that prep prevents lost screws and speeds work.
| Tool | Use | Notes |
|---|---|---|
| Long-handle brush | Scrub grates | Firm bristles or scouring pad; use grill brush strokes with leverage |
| Bucket warm with soapy water | Soak and rinse parts | Dish soap or mild grill cleaner; keep second bucket for rinse |
| Pressurized sprayer | Rinse debris | Adjustable spray, ~50 PSI, 3.5–5 gal tank for portable cleaning |
| Scraper / putty knife | Remove caked-on residue | Use carefully on painted or stainless surfaces |
Step-by-step cleaning: From hot grate to polished exterior
Work systematically from the hot grates outward so each component gets proper attention. Heat the grates on high for about five minutes to carbonize stuck bits, then pass a long-handle grill brush across while the metal is still warm.
If buildup remains, lift out the grates and soak them in warm soapy water. Scrub with a pad or brush and apply a baking-soda paste to tough residue before a strong water rinse.
On gas units, remove burner covers and the burners if you can. Clean burners in soapy water and use a thin wire or toothpick to clear clogged ports. Dry parts completely so gas ignites evenly.
Slide out the drip tray, empty grease, and wash it to reduce fire risk. Wipe the interior to remove loose debris but avoid aggressive scrubbing that strips helpful seasoning.
Finish by washing the exterior with mild cleaner and water, then dry and polish stainless steel if desired. Lightly oil the grate before cooking so food releases cleanly. Reassemble and test burners or vents to confirm even heat and safe operation.
| Step | Action | Why it matters |
|---|---|---|
| Heat grates | High heat, ~5 minutes | Burns off residue and loosens debris |
| Soak grates | Warm soapy water + baking soda | Breaks down baked-on grease |
| Service burners | Soapy wash + clear ports | Restores even flame and safety |
| Drip tray | Empty and wash | Prevents grease fires and smoke |
Deep-clean moves for sticky grease, baked-on debris, and interior buildup
Heavy grease and baked-on residue need targeted moves to restore performance.
Soak and scrub. Remove grill grates and place them in a bucket warm with soapy water for 30–60 minutes. Scrub with a pad, then spread a baking-soda paste on stubborn spots and rinse with water.
Interior wipe-downs work best with a 1:1 water and vinegar solution. Wipe panels and trays to cut sticky films without harsh fumes. Use a grill-safe cleaner or degreaser on heavy spots, then rinse well so no chemicals remain.
When to disassemble
If regular passes fail, take parts apart and clean each piece. Lift burners on gas units, brush them with soapy water, clear port holes with a thin wire, then dry completely before reinstalling.
| Task | Method | Why it helps |
|---|---|---|
| Grates | Soak 30–60 min, baking-soda paste, scrub | Breaks down baked-on residue and grease |
| Interior panels | 1:1 water-vinegar wipe or degreaser | Removes sticky films without strong fumes |
| Burners | Soft brush, thin wire, rinse & dry | Restores even flame and prevents clogs |
- Use a portable pressurized unit (~50 PSI, 3.5–5 gal) to speed rinsing and save water.
- Repeat soak-and-scrub rather than scraping coatings with metal tools.
- Dry parts fully, reassemble in order, then run a medium seasoning burn to remove cleaner scent and prep for food.
Top tips for maintaining a clean grill
A few fast moves after each cook prevent greasy buildup and slow rust on grates and hardware. These habits save time and keep your bbq grill ready to use.
Clean grates while still hot — brush them right after cooking to stop residue from bonding. This two-minute task makes the next session nearly mess-free.
Season and oil the cooking surface
After brushing, apply a light coat of oil to the grate. Use just enough to coat; too much oil can cause flare-ups. The light film helps food release and slows rust.
Monthly exterior care and checks
Wipe the shell and inspect hoses, igniters, and fasteners once a month. Empty and wash the drip tray so grease does not become a smoky, sticky problem.
- Keep the interior’s thin seasoning; remove loose flakes only to preserve heat stability.
- Check burners for even flame patterns and clear blockages quickly.
- Store a cover within reach and keep a small caddy with brush, scraper, towel, and oil near the unit.
- When in doubt, rinse and dry—standing water spots stainless and invites corrosion on hardware.
Pro maintenance hacks: Ash, covers, time-savers, and what not to do
A few smart moves will cut cleanup time and protect parts from weather. These tricks help you keep grill performance high and avoid common, costly mistakes.
Bucket strategy to control ash and moisture
Keep a metal bucket near the cooker and dump cooled ash right after use. Wet ash hardens like cement and ruins fireboxes. This small habit saves you hours of scraping later.
Why a fitted cover matters
Always place a snug grill cover on an outside grill once it cools. A proper cover shields the unit from rain, sun, and dust so the exterior and parts last longer.
Smart rinsing with pressurized water
Battery-powered, pressurized sprayers (about 50 PSI, 3.5–5 gal) rinse greasy debris fast. They save water and cut time when a hose isn’t handy, and they work well at parks or tailgates.
Common mistakes to avoid
- Don’t drench grates with oil — a light film is enough to prevent sticking without feeding flare-ups.
- Avoid aggressive interior scraping; leave seasoning intact and remove only loose flakes.
- Never skip the drip tray; it’s the usual source of grease fires and bad smoke during bbq.
Conclusion
Finish strong with a simple routine that keeps every cook quick and worry-free.
Preheat the grates about five minutes, then use a quality grill brush while they’re still warm to remove residue before it hardens. Empty the drip tray, clear gas burner ports with a thin wire, and wipe the exterior to cut smoke and sticky buildup.
Soak stubborn parts in soapy water, use baking soda or vinegar for stuck spots, then rinse with water or a 50 PSI pressurized sprayer (3.5–5 gal) to blast debris from tight corners.
Lightly oil the grill grates before cooking, keep ash in a metal bucket, and cover the unit between sessions. A steady, short cleaning habit saves time, protects burners, and delivers better-tasting food every time you use your bbq.