DIY Smoker Tutorial: Create Your Own Backyard Smoker
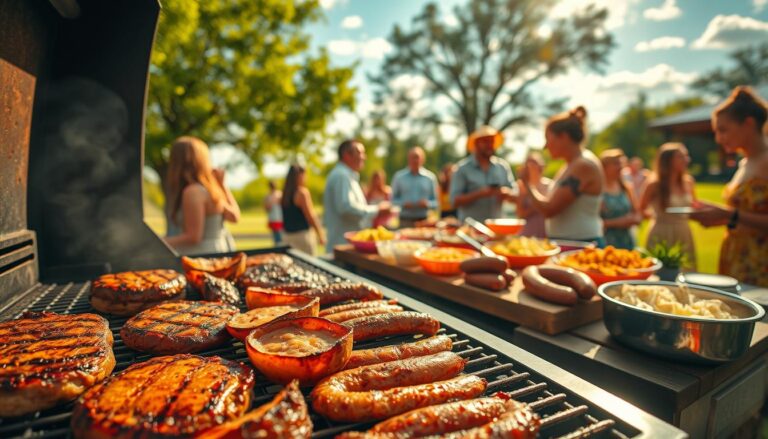
Ready to make great BBQ at home? This guide shows two clear paths: a quick clay pot electric route you can finish…
Ready to make great BBQ at home? This guide shows two clear paths: a quick clay pot electric route you can finish in under an hour and a heavy-duty offset option made from a reclaimed tank for weekend fabrication.
The quick clay pot option needs common tools — drill, Dremel, hammer, screwdriver, needle-nose pliers — and about 30–45 minutes. Typical parts include a 15-inch unglazed clay pot, buffet burner, small grill grate, two stainless pans, wood chunks, and a thermometer.
The larger offset example uses a 250-gallon propane tank for the cook chamber, 1/4-inch plate steel for the firebox, ceramic insulation, and a sizable smokestack placed at grate level. Safety first: purge old fuel tanks with water and dish soap before cutting and work outdoors with good ventilation.
You’ll learn how to pick a cook chamber, plan airflow and stack position, choose materials and tools, and follow clear steps to assemble, season, and run your unit. I’ve got practical extras ahead, like handles for grates, grease drains, and high-temp paint so your pit looks and cooks great.
Key Takeaways
- Two clear builds: quick clay pot path or heavy-duty offset for traditional BBQ.
- Clay pot route finishes in 30–45 minutes with common tools and low cost.
- Offset build needs steel, insulation, and careful tank purging for safety.
- Must-have components: controlled heat, sealed chamber, good airflow, and a grate-level thermometer.
- You’ll get practical tips for finishing touches that improve cook and cleanup.
How to build a DIY smoker: planning your design
Start with the chamber: size and material dictate grate layout, firebox capacity, and draft. Pick clay, drum, or a steel tank and design around that choice.
Choose the cook chamber
Clay pots give thermal mass and are great for quick setups with few tools. Drums are budget-friendly and workable with basic metal tools. A repurposed 250-gallon tank offers heavy-duty capacity thanks to its 1/4-inch thick steel.
Firebox sizing and material
Use a practical rule: the firebox should be about one-third of the chamber’s volume so it holds steady temps without wasting fuel. Aim for at least 3/16-inch steel; 1/4-inch is best for longevity and less warping. Consider 1.5-inch ceramic insulation for extra heat retention.
Airflow and stack placement
Design an offset smoker layout where hot air enters at grate height, flows straight across meat, and exits via a side smokestack at grate level. Make the stack 6–10 inches in diameter and leave it long at first; trim after test cooks to tune draft.
- Two smaller doors cut on curved tanks reduce distortion compared with one giant opening.
- Use angle iron rails and square tubing for rigid grate frames and support.
- Sketch front and side elevations: chamber height, firebox opening, stack position, and tubing mount points.
| Chamber | Typical advantage | Material/Thickness | Best for |
|---|---|---|---|
| Clay pot | Low-cost, simple | Unglazed ceramic | Quick backyard bbq |
| 55-gallon drum | Affordable, mid-size | Thin steel (reinforce grates) | Weekend project |
| 250-gallon tank | Stable temps, big enough capacity | 1/4-inch steel | Serious smoking and volume cooks |
Safety first: heat, tools, and cutting steel tanks
Safety must come first when cutting metal tanks or working near open heat sources. Treat every used fuel vessel as live until you purge it. If in doubt, hire a professional for the first cuts or any welding that carries loads.
Working with a propane or fuel tank
Make sure a tank is fully emptied and neutralized before a single cut. The safest method is to fill the tank completely with water and dish soap. The water displaces residual gas and stops an explosive atmosphere when sparks fly.
Many pros will clean and cut a 250-gallon tank for you. That avoids risk around thick steel and large stored volumes. Keep kids and pets well away while you work.
Heat, ventilation, and tool safety
Set up outdoors in open air. Never run an electric clay pot setup inside a garage or under an overhang. Poor draft makes bitter smoke and ruins flavor; venting the top of a clay lid helped clear smoke in trial runs.
- Wear eye and ear protection, thick gloves, and keep a fire extinguisher handy.
- Secure the tank on a stable stand so people do not shift its weight mid-cut.
- Grinders throw debris—start with a shallow guide pass using a thin abrasive bit, then deepen cuts in controlled steps.
- For a thermometer hole, clamp the lid, drill a pilot hole, and step up bits to the final diameter to avoid cracking.
- Remember hot metal stays hot: use insulated gloves and mark hot edges.
| Risk | Mitigation | When to call a pro |
|---|---|---|
| Residual gas | Fill with water + dish soap | First cut on a 250-gallon tank |
| Sparks / kickback | Shallow guide pass, proper PPE | Welding hinges or load-bearing brackets |
| Poor ventilation | Test outdoors; add top vent on clay lid | Unusual smoke or bitter flavor |
Tools and materials you’ll need
Gathering the right tools and parts makes the next steps far easier and keeps fabrication safe.
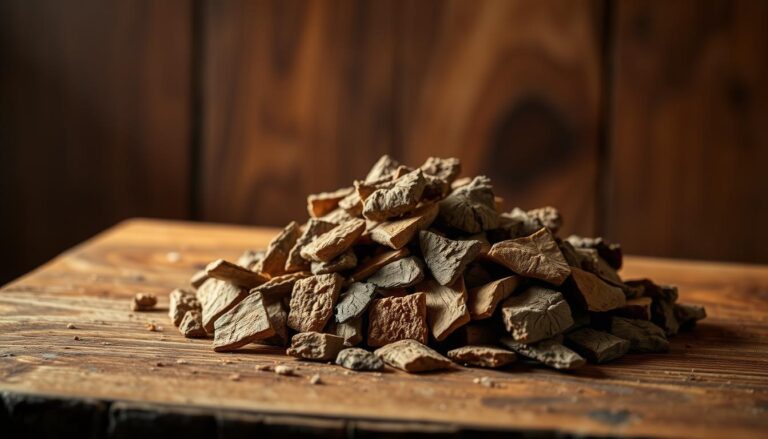
Clay pot build essentials: get a 15–18 inch unglazed clay pot and matching cover top, a single electric buffet burner, two stainless steel pans (one for wood, one for water), a grill grate that fits, and a reliable thermometer.
Hand tools for the clay route include a drill with a masonry bit for the lid, a Dremel with a cutting wheel to shave rivets, a hammer and tap, a screwdriver for the burner assembly, and needle‑nose pliers for small connectors.
Offset steel build kit
Core materials: a 250‑gallon tank for the chamber, 1/4‑inch plate for the firebox, ceramic insulation (about 1.5 inches), square tubing for grate frames, expanded metal for grate surfaces, angle iron, and large pipe for a smokestack.
Power tools and extras: MIG welder, angle grinder with many cut‑off wheels, clamps, plus optional time‑savers like an oxy‑acetylene torch, metal chop saw, jig saw, and welder’s magnets for cleaner fit‑ups.
Practical notes
- Measure the chamber opening so the grate and stainless steel pans sit securely; size matters for stable cooking.
- Buy extras of consumables—cut‑off wheels and clamps wear out fast during fabrication.
- Pick high‑temp rated parts; ditch coated pans and use stainless steel ones to avoid fumes and warping.
- Choose square tubing and angle iron dimensions that won’t flex under heavy loads.
- Keep a small box for bolts, hinge pins, thermometer nuts, and every small piece so you don’t lose critical hardware mid‑step.
| Item group | Key items | Why it matters |
|---|---|---|
| Clay pot kit | Unglazed pot, burner, 2 stainless steel pans, grate, thermometer | Simple, low-cost, quick assembly |
| Offset kit | 250‑gal tank, 1/4″ plate, ceramic insulation, square tubing, expanded metal, smokestack | Durable, high-capacity, stable temps |
| Tools & consumables | MIG welder, grinder, cut‑off wheels, clamps, drill, Dremel | Faster cuts, cleaner welds, safer fabrication |
Step-by-step: build an easy clay pot electric smoker
This short, practical guide walks you through an easy make that uses an unglazed clay pot and a buffet burner. Read each step before you start and gather gloves and basic tools.
- Disassemble the burner. Unplug the unit, remove the center screw and nut, and disconnect the female wire connectors. Twist off plastic cord clamps so only metal parts enter the pot.
- Install the coil at the bottom. Set the heating coil in the pot bottom and route the leads through the drain hole. Reconnect terminals in the original order. Use a 1-inch square tubing wedge to level the coil.
- Prepare pans and grate. Use a Dremel to shave rivet heads and tap pan handles out so stainless steel pans sit flat. One pan holds wood chunks; the other acts as a water pan on a small wire rack.
- Drill the cover top. Bore a 3/16-inch hole (or match your thermometer shaft) in the clay cover top and snug the grill thermometer so you can read temperature at a glance.
- Assemble and fire up. Stack coil, wood pan, then grate on the pot lip. Place meat on the grate, set the top cover, and start the burner at medium. Watch for about 200°F and adjust from the outside—make sure you use the burner control, not repeated lid lifts.
Tips: Use larger wood chunks for longer smolders. If smoke tastes bitter, add small vent holes in the cover. Later upgrades I’ve got include a larger stainless wood pan and a separate water pan on a wire rack for steadier temps.
| Position | Item | Reason |
|---|---|---|
| Bottom | Heating coil | Even heat source |
| Above bottom | Wood pan (stainless steel) | Controlled smoke |
| Top | Grate and meat | Clear airflow under cover |
Safety note: wear heat-resistant gloves and run this outdoors in open air. Avoid Teflon pans—use stainless steel for durability and food safety.
Step-by-step: build a heavy-duty offset smoker from a steel tank
Begin by scribing door lines at grate level and plan hinge tacks before final cuts to keep the metal true. Mark the bottom line roughly one-quarter around the tank and place the top cuts a few inches from the tank top so each door spans the grate height.
Hinges, handles, and seals
Tack hinge tubing above the cut lines, then finish the door cuts. Bend round stock into L-shaped pins and weld full hinges so doors hold alignment. For easy lifting, weld a short tube between two bent round-stock standoffs; the tube will rotate as a handle.
Weld 1-inch x 1/8-inch flat bar around door perimeters to seal leaks. Work in short clamps, matching the tank curve along the sides and top for a tight fit.
Smokestack, grates, and firebox
- Cut the smokestack opening at grate level; weld a collection box plate and then a 5–10-inch diameter stack, leaving it long for tuning.
- Install angle-iron rails and removable frames from square tubing with expanded metal tops, stitch-welded to avoid warp.
- Fabricate the firebox from 1/4-inch plate sized at about one-third chamber volume. Capture 1.5-inch ceramic insulation with 1.5-inch square tubing and skin with 14-gauge sheet after welding to the chamber.
Final step: seasoning
Burn out the chamber with a big charcoal and wood fire, clean debris, then oil the interior and run another long hot fire. Repeat once so the steel darkens and gains a protective, food-safe surface.
Temperature control, fuel, and smoke management
Keeping steady heat and clean draft makes the difference between tender, smoky meat and bitter disappointment. Hold target temperatures and manage fuel so the cook runs evenly. Preheat the whole cooker so the metal heat-soaks and buffers swings.
Target temps for low-and-slow
Set your range at 200–250°F. This sweet spot renders fat and breaks down connective tissue while keeping meat juicy. Place thermometers at grate level for the air the meat actually sees.
Fuel choices and burn management
Electric clay pot rigs work well with wood chunks for flavor, while offset pits run best on a small, clean-burning wood or charcoal fire. Add splits on a schedule and give new fuel time to catch before closing the door.
Clean smoke and airflow
Thin blue smoke is the goal. Starved fires make thick white smoke that tastes acrid. On clay setups vent the top slightly; on offsets leave the stack wide and tune intake or fire size rather than choking exhaust.
| Goal | Quick fix | Why it matters |
|---|---|---|
| Stable temp | Preheat cooker | Smooths fuel additions |
| Clean smoke | Open stack/intake | Sweet flavor, less bitterness |
| Consistent cooks | Log time and fuel | Learn your pit’s way |
Make it user-friendly: grates, handles, and access
Small details matter when you use your smoker every weekend. Design grates and access points so cleaning and mid-cook adjustments are simple. Aim for removable pieces that slide out with one steady lift.
Removable expanded metal grates and angle iron brackets
Frame grates with square tubing and top them with expanded metal. Slide them onto angle iron rails welded inside the chamber for a level fit and room for thermal expansion on the sides.
Add handles for easy reloads
Add rod or round-stock handles so you can lift a hot piece with gloves and reload wood or water mid-cook. On the clay pot option, small wire handles let one person lift the grate without juggling pans.
“Make access predictable — test clearances before final welds so nothing binds during a cook.”
- Keep handles tall enough to grab with mitts and clear door seals.
- Choose robust ones for daily use; thicker stock resists bending.
- Mount a small tool box or hook rail for tongs, thermometers, and gloves.
| Feature | Material | Benefit |
|---|---|---|
| Removable grate | Square tubing + expanded metal | Easy cleaning and reconfiguration |
| Rails | Welded angle iron | Stable support, allows expansion |
| Handles | Round stock or wire | Safe mid-cook access |
Finishing touches and upgrades for long-term use
Finish work and smart add-ons extend life and make cooking easier on every run. Small upgrades protect your investment and cut cleanup time. Spend a little time now and the chamber will reward you for years.
Get paint that holds up: prep exterior steel with a wire brush and degreaser, then get paint rated for high temperatures. Rattle cans work well for quick coats; for a show finish, many people have auto shops apply professional high-temp coatings.
Dial in temperature and grease handling: mount reliable thermometers at grate level so the readout matches what the food sees. Add a grease drain by welding a short pipe nipple at the chamber low point and fitting a ball valve and cap for drip-free cleaning.
Practical upgrades: raise coals on a small firebox grate, add firebrick for heat retention, and fit simple dampers on the stack or intake if you want get finer control. For trailer setups, weld rectangular tubing supports and set grate height near waist level for comfort.
Last step: seal doors with a thin high-temp gasket or flat bar, test-fit covers, and run a short seasoning burn after painting. If you’ve got outdoor storage, add a fitted cover to protect the finish between big bbq sessions.
Conclusion
Pick the option that fits your skillset: a quick pot rig for same-day smoking or a tank-based offset for long-run capacity. This choice guides material, time, and the size of the chamber you’ll use.
Safety first: if you cut a tank, purge it with water and dish soap before any sparks fly. For an offset, favor 1/4-inch firebox steel and place the smokestack at grate level so smoke flows cleanly across meat.
Season new steel with a hot burnout, clean, oil, then run a long hot fire. Add a bottom water pan in simpler rigs for steady humidity and use a good thermometer at grate level for reliable reads.
Final note, you’ve got two solid paths that reward patience and attention. Fire it up and enjoy the bbq results from your chamber and craft.